How to Automatically Track Webflow Sitemap Changes in Airtable

Why build this tool?
I’ve used a version of this tool for myself in many situations many times — either while auditing a Webflow site, managing a migration, or helping a client strategize site architecture changes. Recently, a friend and Webflow agency owner, Hal, tweeted for help finding a tool like this.

I took the opportunity to refine my Airtable system + script and share it with the Webflow community. This setup is a great starting point for building a custom Webflow tracking system. I can imagine a handful of other ways this might be used, including:
- As a team dashboard for devs, designers, or marketers to share their monthly progress with the rest of an organization
- Simply to audit an existing sitemap and identify opportunities for cleaning up
- As a way to keep multiple stakeholders using a site aware of publishing changes
Getting Started
The setup is fairly basic, you’ll need:
- An Airtable account. Even the free version has scripting and automations, which you’ll need for this to work.
- A Webflow site with link to the autogenerated sitemap
This isn’t meant to be a comprehensive explanation of Airtable, Webflow, or JavaScript. I’m assuming you have some baseline knowledge of these tools. If you want a hand implementing it, reach out and we can set up a paid consulting call.
Airtable Setup:
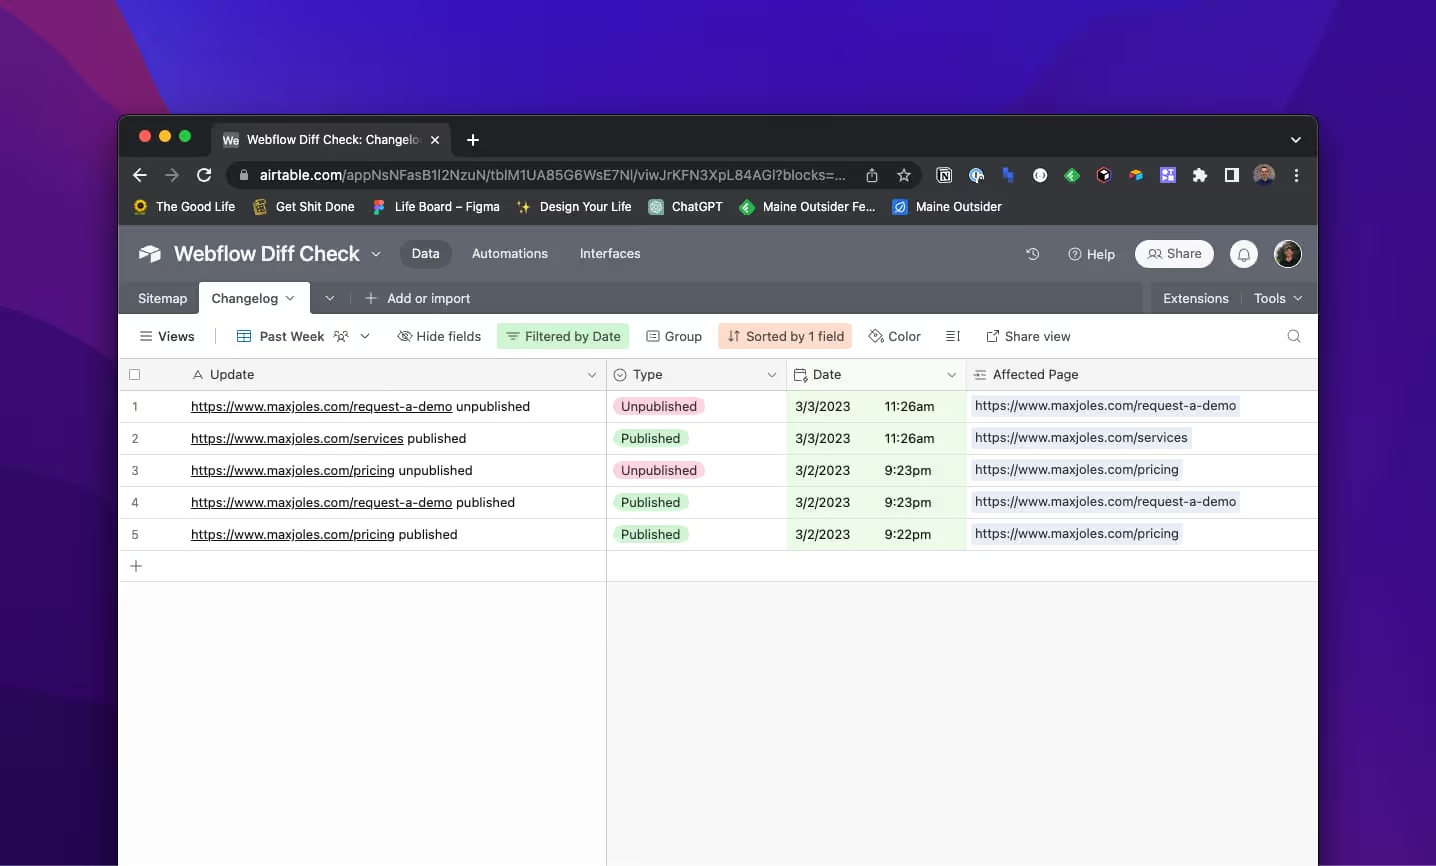
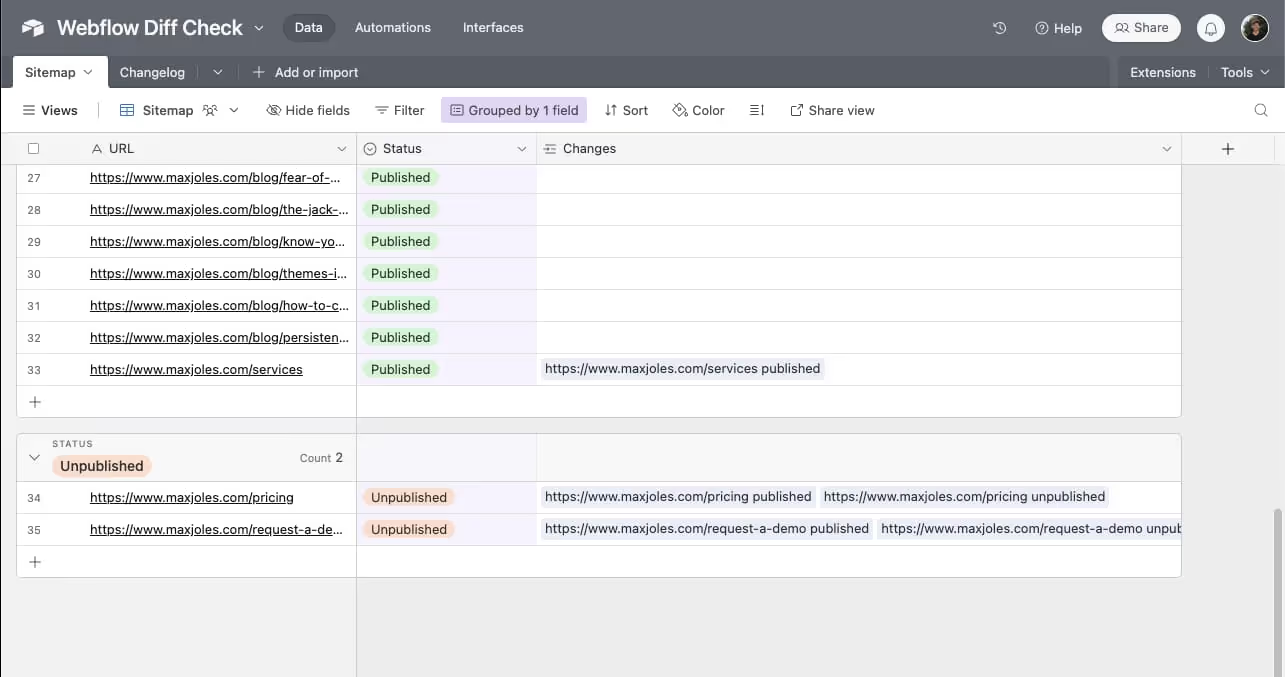
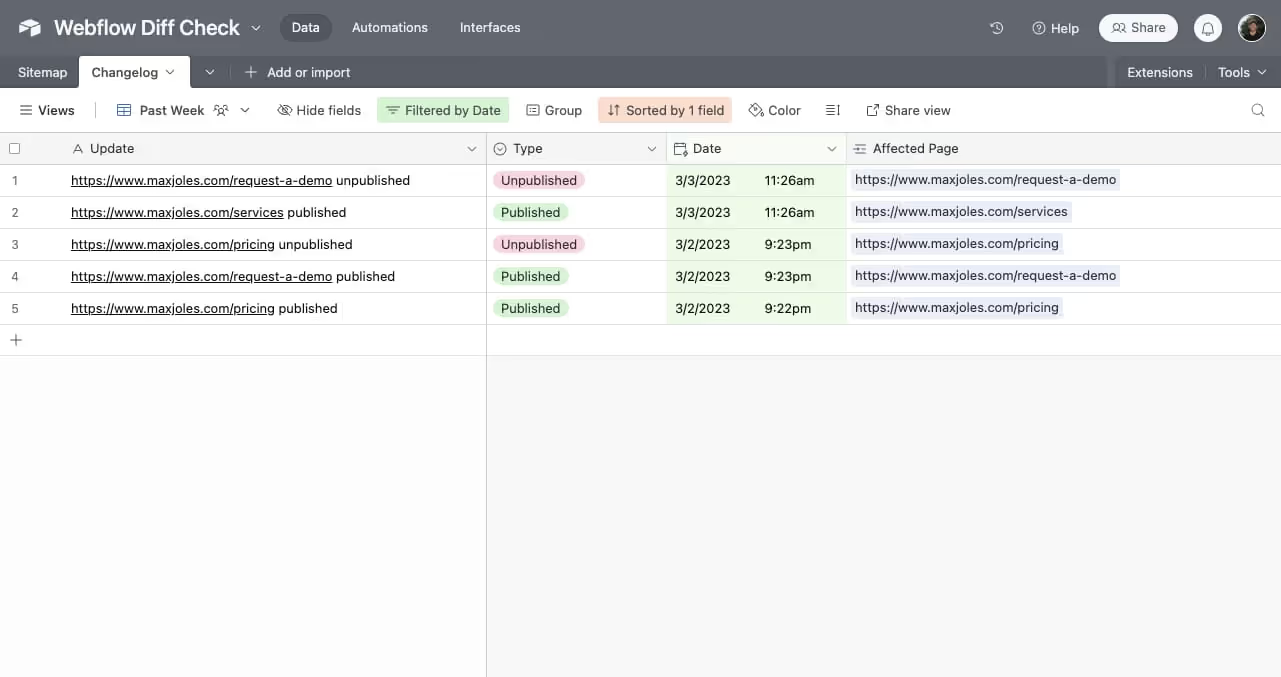
Start by creating a base with two tables: Sitemap and Changelog. These linked tables will store all of the details outputted by the script. You can reference the images below and text to configure your tables properly.
Sitemap Table Fields:
URL: Single Line Text Field
Status: Single Select Field
Changes: Multiple Linked Records Field

Changelog Table Fields:
Update: Single Line Text Field
Type: Single Select Field
Date: Date Field
Affected Page: Single Linked Record Field

Script Setup:
If you set up the tables as described above, the script should work properly. The only edit required in the script is to replace the sitemap link with your own.
There are two options for running the script. You may either run it manually whenever you want using Airtable scripting or you can you Airtable Automations to run it on a schedule — for example daily.
When you initially run the script it will download the entire sitemap, which may take a little time. It will also create a new changelog record for each sitemap page added initially. If you only want to see changes from this point forward, you can delete all of those changelog records without repercussions.
Once set up, the script will compare differences between versions of the sitemap stored in Airtable and Webflow. Anytime there is a change, it will output an update saying what pages was published or unpublished.
Edit: Since publishing, Shane, has taught me that you can configure Airtable automations to run on a Webhook, which can be triggered by Webflow site publish 🎉
This script could have been re-factored to run more quickly in Airtable, but I didn’t feel it was worth the effort currently. The first crawl may take some time, but subsequent updates will be quick.
How to customize it
Once the data is in Airtable and the system is set to autopilot, you’re free to customize in any number of ways. You can create custom views or reports and add any additional fields that might be helpful to your workflow. The only thing that may break the script, is a change to the following:
- Table names
- Default field names
Anything else, is fair game. If you do want to change table names or fields names, just make sure you update the references in the script.


